


Installing a new interior door may look like a complicated job, but with the right steps and simple tools, it becomes a very manageable DIY project. Whether you are replacing an old door, upgrading your home style, or improving privacy between rooms, learning how to install an interior door can save money and give you a sense of accomplishment.
This complete guide is designed for beginners and homeowners in the US. It uses easy English, clear steps, and practical tips so you can follow along without confusion. By the end, you will understand everything from choosing the right door to finishing the installation like a professional.
Why Installing an Interior Door Matters
Interior doors are more than just panels that open and close. They play an important role in your home.
They improve privacy between rooms, reduce noise, help control temperature, and add style to your interior design. A properly installed door also works smoothly, does not stick, and lasts for many years.
If a door is installed incorrectly, it can cause problems like gaps, squeaking, uneven closing, or difficulty locking. That is why it is important to learn the correct process of how to install an interior door step by step.

Types of Interior Doors You Can Install
Before starting, you need to understand the type of door you are working with.
Prehung Interior Doors
A prehung door comes already attached to its frame. This is the easiest option for beginners and is highly recommended if you are learning how to install an interior prehung door.
Slab Doors
A slab door is just the door without a frame. You must attach hinges and fit it into an existing frame. This requires more skill and accuracy.
Common Door Styles
Panel doors are classic and widely used
Flush doors have a smooth, modern look
French doors add elegance with glass panels
Pocket doors slide into the wall and save space
Tools and Materials You Will Need
Before starting, gather all tools so your work becomes smooth.
You will need a measuring tape, level, hammer, screwdriver, drill, wood shims, nails or screws, utility knife, and a saw. You will also need the door itself, hinges, and a handle or knob set.
Having everything ready helps you focus on learning how to install an interior door without interruptions.
Preparing the Door Opening
Preparation is one of the most important steps.
First, remove the old door if there is one. Take out the hinges and carefully lift the door away. Remove the old frame if you are installing a prehung door.
Next, check the opening. It should be clean, dry, and free from damage. Measure the width and height of the opening to ensure your new door fits correctly.
Make sure the floor is level. If the floor is uneven, the door may not close properly.
How to Install an Interior Prehung Door
Installing a prehung door is the easiest way for beginners. Follow these simple steps carefully.
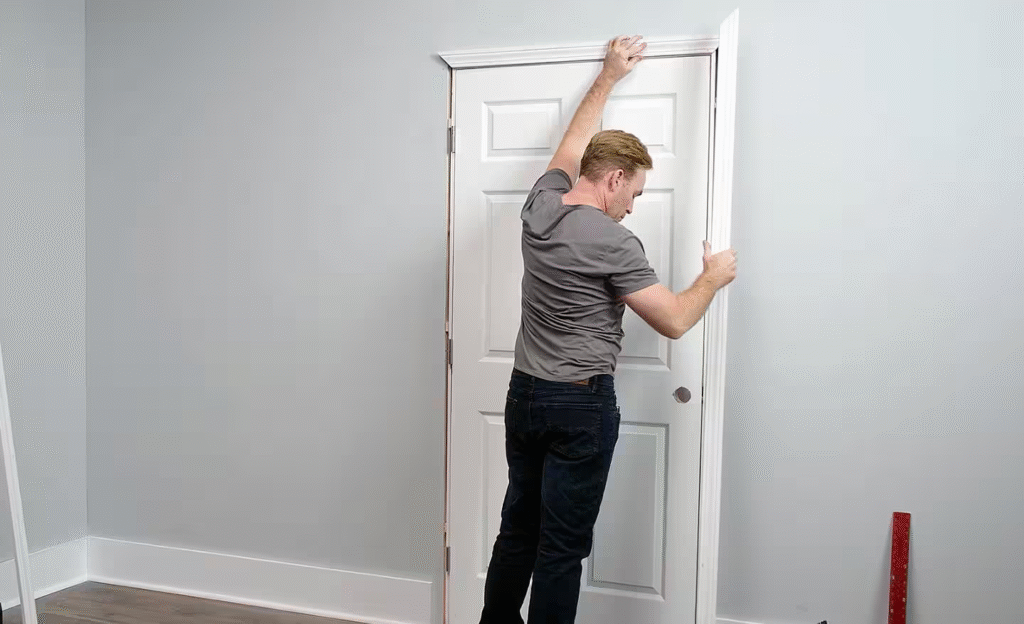
Step 1: Place the Door in the Opening
Lift the prehung door and place it into the rough opening. Make sure the hinge side is where you want the door to swing.
Step 2: Check Alignment
Use a level to check if the door frame is straight. This step is very important. A crooked frame will cause the door to stick or swing open by itself.
Step 3: Add Shims
Insert shims between the wall and the door frame. Place them near the hinges and along the sides. This helps hold the door in place and keeps it straight.
Step 4: Secure the Frame
Use screws or nails to fix the frame into the wall. Start with the hinge side first, then move to the other side.
Step 5: Test the Door
Open and close the door several times. It should move smoothly without rubbing or sticking.
Step 6: Trim Excess Shims
Cut off any extra shim material so it does not show.
Learning how to install an interior prehung door is easier because most of the alignment work is already done for you.
How to Install a Slab Interior Door
If you are installing a slab door, the process is more detailed.
Step 1: Measure and Cut
Measure the opening and trim the door if needed so it fits properly.
Step 2: Mark Hinge Locations
Place the door next to the frame and mark where the hinges will go.
Step 3: Install Hinges
Attach hinges to the door first, then to the frame.
Step 4: Hang the Door
Lift the door and align the hinges with the frame. Secure them with screws.
Step 5: Check Movement
Open and close the door to ensure smooth operation.
This method requires more precision, but it gives flexibility if you are working with an existing frame.
Installing the Door Handle and Lock
Also Read: What Is Smart Home Interior Design? A Complete SEO Guide for Modern Living (2026)
After hanging the door, the next step is installing the handle.
Mark the correct height for the handle, usually around 36 inches from the floor. Drill holes for the latch and knob. Insert the latch, then attach the handles on both sides.
Make sure everything is tight and working smoothly.
Finishing Touches
To complete your project, you need to finish the door properly.
Install trim or molding around the frame to cover gaps. Paint or stain the door to match your interior style. Add weather stripping if needed for better insulation.
These final steps improve both the look and performance of your door.
Common Mistakes to Avoid
Many beginners make simple mistakes when learning how to install an interior door.
Not checking level properly can cause alignment issues
Using too few shims can make the door unstable
Over-tightening screws can warp the frame
Ignoring gaps can affect insulation and appearance
Avoiding these mistakes will give you a professional result.
How Much Does It Cost to Install an Interior Door
The cost depends on different factors such as door type, labor, and materials.
If you install it yourself, the cost is usually between 100 to 300 dollars for a standard door.
If you hire a professional, the total cost can range from 300 to 800 dollars depending on complexity.
Understanding how much does it cost to install an interior door helps you plan your budget better.
DIY vs Hiring a Professional
Installing a door yourself saves money and gives you control over the process. It is a great option if you enjoy DIY projects and have basic tools.
Hiring a professional is better if the opening is damaged, uneven, or requires structural changes. Professionals ensure perfect alignment and save time.
Maintenance Tips After Installation
Once your door is installed, regular maintenance keeps it working smoothly.
Clean the door surface regularly
Tighten screws if they become loose
Lubricate hinges to prevent squeaking
Check alignment once a year
Proper care extends the life of your door.
Expert Insights for Better Results
From a professional perspective, the key to mastering how to install an interior door is patience and precision.
Take time to measure accurately. Never rush alignment. Even small mistakes can affect the final result.
Using quality materials also makes a big difference. Cheap hinges or handles can wear out quickly.
Another important insight is to always test the door multiple times during installation, not just at the end.
Also Read: Kracensoft.com: Complete Guide to IT Solutions, Features, Pricing, and Business Growth
Conclusion
Learning how to install an interior door is a valuable skill that improves your home and saves money. With the right tools, clear steps, and attention to detail, even beginners can achieve professional results.
Whether you choose a prehung door or a slab door, the process becomes easier when you follow a structured approach. From preparation to finishing touches, every step matters.
Take your time, stay patient, and enjoy the process. A well-installed door not only looks great but also works perfectly for years.
FAQs About how to install an interior door
What is the easiest type of interior door to install?
A prehung door is the easiest because it already comes attached to its frame. It reduces measuring and alignment work for beginners.
Do I need to remove the old frame before installing a new door?
Not always. If the existing frame is in good condition and straight, you can keep it. Otherwise, replacing it is better for proper alignment.
What is the most important step when installing an interior door?
Proper leveling and alignment are the most important steps. Even a small tilt can cause the door to stick or not close properly.
Can I install an interior door by myself without help?
Yes, but it can be difficult when lifting and holding the door in place. Having one helper makes the process much easier and safer.
Why does my new door not close properly after installation?
This usually happens due to uneven shimming or incorrect leveling. Adjusting the frame and tightening screws can fix the issue.
How do I know if my door frame is square?
Measure diagonally from corner to corner on both sides. If the measurements match, the frame is square and ready for installation.
What is the average lifespan of an interior door after installation?
A well-installed interior door can last 20 to 30 years or more. Proper maintenance like hinge tightening helps extend its life.


